Denim Jacket Pattern Review – Simplicity S8845
- Amy Budd

- Jul 16, 2025
- 5 min read

I’ve discovered that I love making jackets! I love making all sorts of clothes but I think there is something extra special about the series of relatively straight forward steps that go into making a denim jacket that eventually give you such a satisfying result. So I’ve known for a while now that I wanted to make Simplicity S8845 – a unisex denim jacket pattern by Mimi G. I firstly made one for myself and then ended up making another two – one for my Mum and one for my partner, Gareth!

Fabric
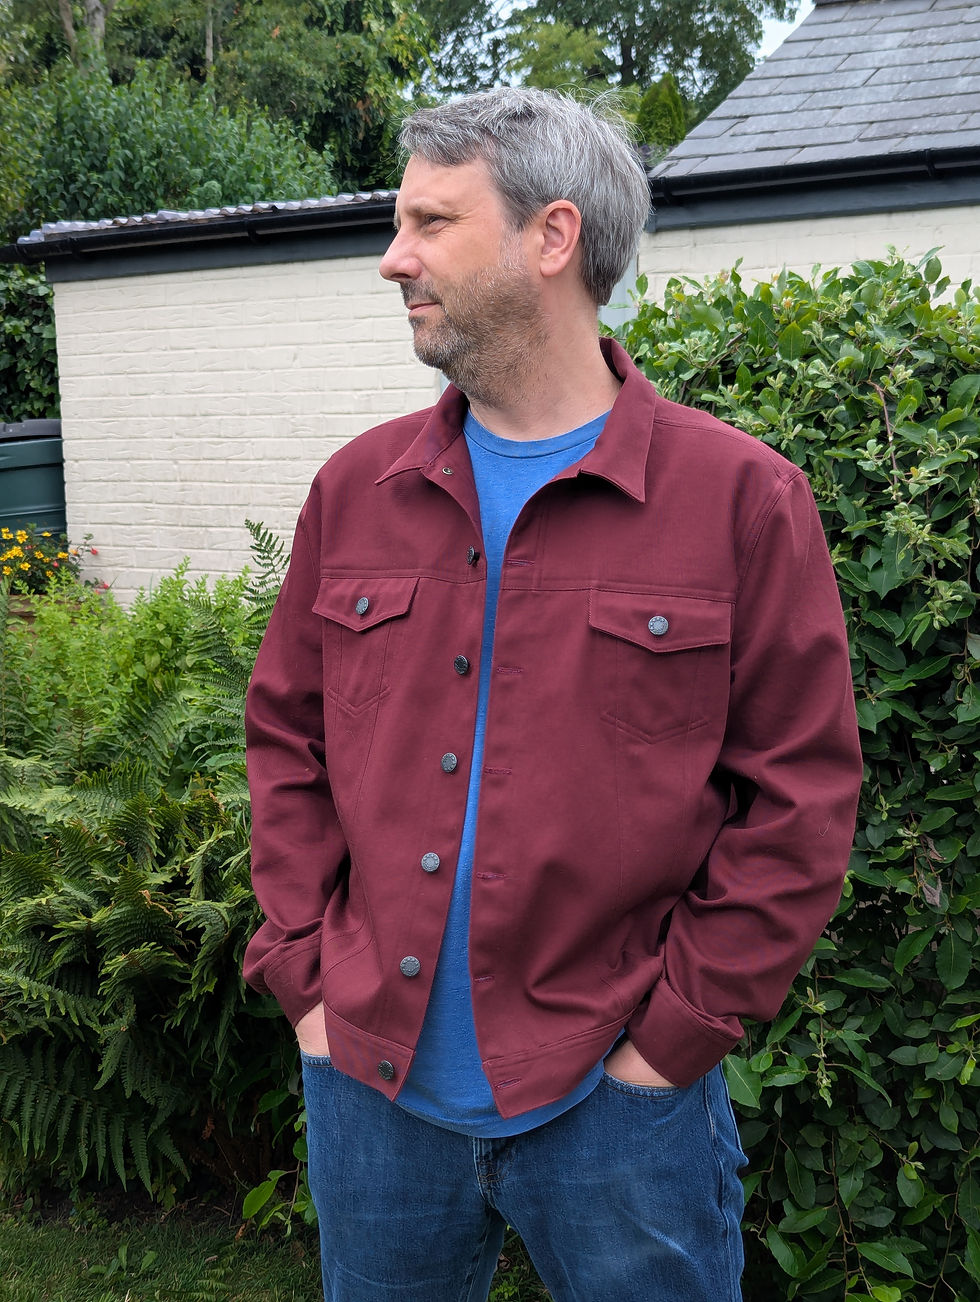
Fabric wise the pattern suggests chino, corduroy, denim, sateen or twill. I made my own version in a cream coloured lighter weight twill fabric which is perfect for a lightweight spring / summer jacket. That fabric was from Sew Much To Do when they had their shop in Ely. My Mum’s version was made from a lovely cotton canvas with a light beige background and green foliage design from the craft section of the City Cycle Centre in Ely and Gareth's was a heavyweight twill in burgundy bought online with Ray Stitch.
I thought all three fabrics worked really well for the pattern. You do need something with a bit of weight and structure to hold the jacket shape but at the same time light enough to allow you to sew through several layers easily, due to the flat fell seams and other areas where multiple layers of fabric are sewn together such as the pocket areas.
Fitting
In terms of fitting, the pattern has five sizes – extra small, small, medium, large and extra large. I cut out a size small for myself and then made some adjustments to the length of the bodice as it was too long for my liking and also the length of the sleeves. I reduced the bodice by two inches and the sleeves by one. Due to the fact that the bodice was now shorter, there wasn’t really enough room to include the welt pocket, so I just disregarded that part of the pattern. I also did the same on the other two versions as it felt a bit unnecessary.
I firstly made toiles for Gareth and my Mum’s versions. With Gareth, he would usually be a medium in ready to wear men’s clothes but the medium came out too small for him, so I used a size large in his final version. My Mum’s version was based on a size small with some additional width added to the hip area and slightly more shortened sleeves.
Overall, it was an easy pattern to fit with nothing too challenging to worry about.

Sewing
As I’ve mentioned above, sewing this pattern was really enjoyable and satisfying. Sometimes the instructions that come with large pattern companies such as Simplicity can take a bit of deciphering but I didn’t have any trouble with these ones. They are all quite clear and split up into useful steps and sections that you can just work through. I couldn’t see a difficulty rating on the pattern that you sometimes see but I would personally rate it around intermediate level. There is a really useful sew-along on YouTube which takes you through things step by step if you need it.
There’s a few areas that I would look out for and take your time with if you decide to make this pattern:
When you are attaching the upper pocket to the front bodice, there is quite a small area at the top where the two layers overlap, so you have to be careful to catch both layers when sewing on the right and the left.
The instructions do not tell you to finish the bottom edge of the pocket facing. I think this is because most of it will be covered by the pocket itself. However there is a very small bit which sticks out on both sides. If you are worried about fraying, you might want to finish that bottom edge before attaching it to the front bodice
The same can be said for the upper pocket piece – the edges are pressed to the right side and when you open the pocket flap from the right side of the jacket, you can see a very small amount of the raw edges on each side inside the pocket. I ended up snipping a bit of it away so it’s less visible but you could overlock the edges before attaching this piece if it bothers you.
When you come to attach the front yoke to the front, depending on your fabric choice, you may find, like me, that you have too many layers of fabric (yoke, front, pocket, pocket facing) to be able to create a nice looking flat fell seam in that area. Instead, I overlocked that seam and then just sewed my two lines of stitching to create a ‘faux flat fell’. You could potentially snip away some of the thickness in that area but I opted to overlock instead.
As you attach the lower band to the bodice, take care to line up the edges and notches accurately. If you don’t do that, then the band does not sit in line with the rest of the front edges. (As long as you have cut the band the right size, it should be fairly straight-forward).
Make sure you place your tabs so they are pointing to the back on the lower band. I got this wrong on my first version. Not a big thing but pointing to the back is how the pattern suggests and if you forget to transfer these pattern markings, the only other place you can check this is on the line drawing at the start of the instructions.
One of the more difficult steps is stitching the flat fell seams on the side seam into the under arm seam. It feels like it should be impossible but just take your time and very carefully create a ‘tunnel’ as you sew and you will get there!

Style
My view of this pattern is that it’s one that is timeless – I don’t think it will ever date, as such, because it’s such a classic denim jacket design. For that reason, it will look equally as nice over a T-shirt with jeans and trainers or layered over a nice dress. Obviously your choice of fabric will have an impact but if you’re like me then you will be considering making one in lots of different fabrics, so you have one to go with every outfit!
Overall a great pattern that I would definitely recommend and one that I will likely continue to use for many years.


Comments